Quantcast
Channel: Windows 8 – Password Recovery
Viewing all 396 articles
Browse latest View live

How to Unlock My Password Protected Windows 8/7/Vista/XP User Account

$
0
0

I have my Windows XP account password protected but now I can’t remember the password. I just set it up today but I forgot the password I chose. Is there a way to unlock or remove this password so I can use my computer?

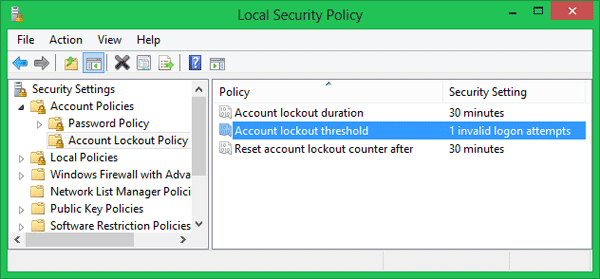
Forgot the password to the only administrator account on your PC, or lock out of Windows user account after unsuccessful logon attempts? Well, these problems can be solved with a bootable PCUnlocker USB drive. Rather than cracking a Windows user account password, PCUnlocker removes it and unlock your locked-out Windows account instantly!

How to Unlock My Password Protected Windows 8/7/Vista/XP User Account?

  1. Download the zipped ISO image of PCUnlocker and save it on another PC you can log on. Double-click on the .zip file and the system will show you the contents inside. Drag the pcunlocker.iso file from that window to your desktop, then burn it to a USB flash drive using ISO2Disc program.

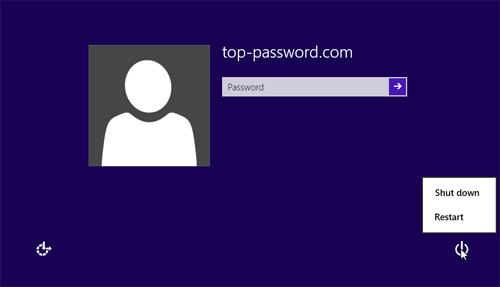
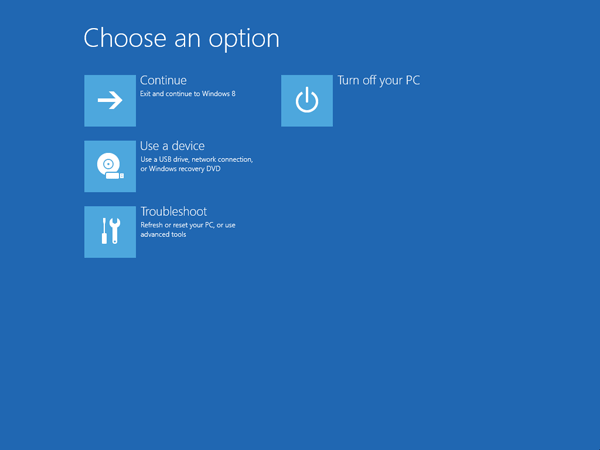
  2. Insert the bootable USB drive into your password-protected computer. When the computer is booting, you will need to press the correct key to get into the Boot Menu. It is usually F12 or Del key. Once in the Boot Menu, select your USB flash drive and press Enter.
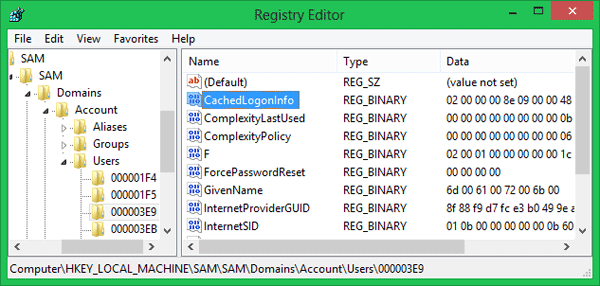
  3. The computer will load the WinPE operating system from the bootable USB drive. After a while, you’ll see the PCUnlocker program. It will read the Security Accounts Manager (SAM) files of your Windows system and show you a list of local user accounts.

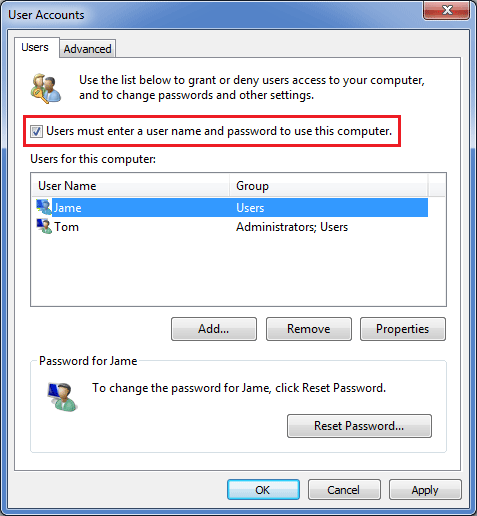
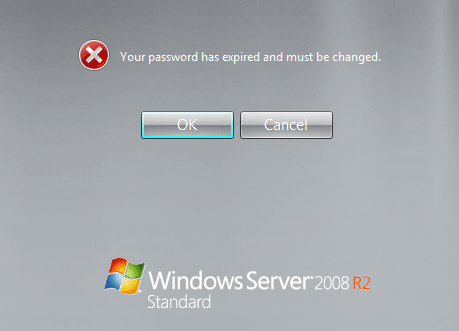
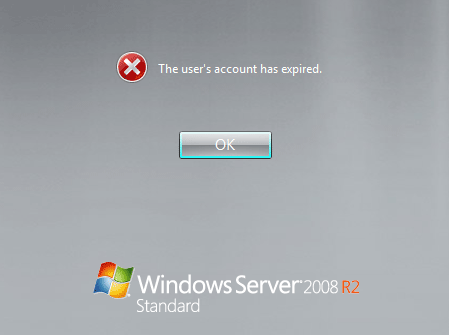
  4. Choose your user account and click on Reset Password. The program will reset your lost Windows account password and also unlock your user account if it is already disabled, locked out or expired.
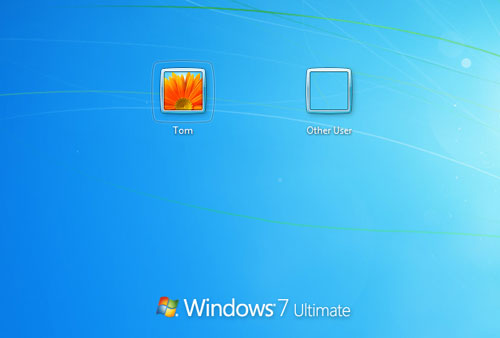
  5. Click on Restart button and remove the bootable USB drive. The computer will then boot normally to the Windows login screen. Just leave the password box as blank and you can successfully log back into your Windows user account.

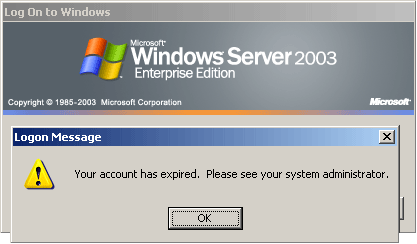
So this is how can you unlock any password protected Windows 8/7/Vista/XP user account. This method also works with both local user accounts and Active Directory user accounts on Windows Server 2012/2008/2003/2000.


2 Options to Find Windows 8 OEM Product Key Easily

$
0
0

How to find Windows 8 OEM product key? Even if you’ve formatted the hard drive or uninstall the OS, you can still retrieve your Windows 8 OEM product key from BIOS.

If you’ve purchased a computer which comes pre-installed with OEM Windows 8, you will no longer see a sticker on the back or top of the machine with product key printed on it. Now computer manufactures are embedding the Windows 8 product key in the BIOS of computer’s motherboard. In this tutorial we’ll show you two options for you to find Windows 8 OEM product key easily!

Option 1: Find Windows 8 OEM Product Key with RWEverything

Have your uninstalled Windows 8 or downgrade to Windows 7? That’s where RWEverything comes to rescue. This is a free utility that enables you to access all hardware information in your computer’s BIOS, including the Windows 8 OEM product key. Here are the steps:

  1. First of all, download the proper version of RWEverything and save it on your computer. The download file is a self-extracting ZIP archive.
  2. Extract the program from the zipped file, and double-click the RW.exe file to launch the program.
  3. click ACPI icon from the top toolbar, and then click on the MSDM tab. You’ll find your Windows 8 OEM product key in the Data row.

    find-windows-8-oem-key

Option 2: Find Windows 8 OEM Product Key with Product Key Finder

Besides being written in BIOS, Windows 8 OEM product key is also encrypted and stored in the Windows Registry. Product Key Finder is a simple program which can help you find Windows 8 OEM product key from Windows Registry.

I’ve tested both Product Key Finder and RWEverything on several Windows 8 pre-installed machines, and the product keys retrieved within these tool are correct. The biggest advantage of Product Key Finder is that it can also find Windows 8 product key from Non-OEM and Retail computers. Here are the steps of using Product Key Finder to recover Windows 8 OEM product key:

  1. Download and install Product Key Finder on your Windows 8 computer.
  2. After installing it, launch the program.
  3. Click on Start Recovery button, and then choose the “From current system” option from the pop-up menu.

  4. The program will display your Windows 8 OEM product key, as well as CD keys for Microsoft Office, SQL Server and many other software.

How to Bypass Windows Local Administrator Password with A USB Drive

$
0
0

If you’re using a single administrator account, it’s surprisingly easy to lock yourself out of your own computer by losing your password. Luckily, its just as easy to get back in again without data loss – so long as you have a blank CD or a USB flash drive. Here’s how to bypass Windows local administrator password with a USB drive.

How to Bypass Windows Local Administrator Password with A USB Drive?

  1. Download the PCUnlocker program from http://www.top-password.com. The download file is a zipped ISO image file. Double-click the zip file and the system will display all the contents in a new window. Just drag the pcunlocker.iso file from that window to your desktop or another location you can find easily.
  2. Burn the ISO image to a USB flash drive using ISO2Disc program. The USB flash drive has to be at least 512 MB.
  3. Connect the USB flash drive to your locked computer that you want to bypass Windows local administrator password on. Turn on the computer and change the boot order in BIOS. Make sure the Removable Device is the first boot device.
  4. After booting from the USB flash drive, you’ll see the WinPE operating system start. Just about half a minute later, you’ll see the PCUnlocker program. It displays all your Windows local user accounts.
  5. Choose the local administrator account and click on “Reset Password” button. The program will quickly remove your forgotten Windows local administrator password, as well as unlocking your administrator account if it’s locked out, disabled or expired.
  6. Click on Restart. Unplug the USB flash drive from the computer. Now you can log back into your Windows local administrator account using a blank/empty password.

Forgot your Windows local administrator password? This tutorial allows you to bypass local administrator password on Windows 8, 7, Vista, XP and Windows Server 2012/2008/2003/2000. If you don’t have a USB drive or your computer doesn’t support USB booting, you can opt to burn PCUnlocker program to a blank CD and use it to bypass Windows local administrator password.

How to Reset Lost Windows 8 Password on Acer Iconia Tablet

$
0
0

Forgot Windows 8 password of your Acer Iconia tablet? You can restore the tablet to factory settings but all stored contacts and any programs you’ve installed will be erased. Obviously, this is not what you’re looking for. In this tutorial we’ll show you how to reset lost Windows 8 password on Acer Iconia tablet without data loss.

How to Reset Lost Windows 8 Password on Acer Iconia Tablet?

This method requires you to create a bootable PCUnlocker USB drive which contains Windows password resetting utility. Just boot your Acer Iconia tablet from the USB drive and you can reset lost Windows 8 password easily. Here are step-by-step instructions:

  1. Download the zipped ISO image of PCUnlocker and save it on any computer you have access to. Unzip the download file and you’ll find a bootable ISO image file: pcunlocker.iso. Simply burn it to a USB flash drive using ISO2Disc.
  2. Shut Down / Power Down the Acer Iconia Tablet. Hold the WINDOWS button (bottom left) and then hold down the POWER button (top left). When the machine starts, press F2. This will display the BIOS setup. Change the boot order to boot from the USB HDD. Save changes and exit BIOS setup.
  3. Plug in the USB flash drive, and restart the computer. The computer will boot into PCUnlocker program from the USB drive. By default, the program will search your Windows 8 registry files and display a list of local user accounts existing on your Acer Iconia tablet.
  4. Simply choose a user account and click on “Reset Password” button. The program will reset your lost Windows 8 password immediately.
  5. Unplug the USB drive from the tablet and restart the machine, you can then log back into Windows 8 system without a password.

Using this method you can reset lost Windows 8 password for both local user account or Microsoft account on Acer Iconia tablet. It can be a life saver in case you forgot the login password. No need to send your tablet to Acer for service.

How to Reset Forgotten Password on ThinkPad Windows 8 Tablet

$
0
0

Did you lock yourself out of your ThinkPad tablet? Forgot your Windows 8 password? It’s clearly an issue all of us have experienced at some point in time with varying degrees of importance and frustration. In this article we’ll provide an easy way to reset forgotten password on ThinkPad Windows 8 tablet.

First of all, you need to create a bootable PCUnlocker USB drive on another PC you have access to. Boot your ThinkPad tablet from the USB drive and it enables you to reset forgotten Windows 8 admin/user password easily. Here are step-by-step instructions.

How to Reset Forgotten Password on ThinkPad Windows 8 Tablet?

  1. Download the zipped ISO image of PCUnlocker program. After you’ve downloaded it, double-click the download file and your system will display all files inside the zip archive. Drag the pcunlocker.iso from there and save it on your desktop.
  2. Install ISO2Disc program and launch it. Click on Browse button to locate the ISO image you’ve downloaded, then choose the USB flash drive you’ve plugged in and click on Start Burn to create a bootable PCUnlocker USB drive.
  3. Plug the USB drive to your ThinkPad Windows 8 tablet PC. When you turn on the tablet, press the power button together with the volume up button at the same time to enter the ThinkPad Setup program.
  4. Once into the BIOS screen, select Startup. then Boot. Move your attached USB drive to the top of the bootable device list. Switch to the Security tab, disable the Secure Boot option. Press F10 to save your changes and then reboot.
  5. After booting from USB drive, it will start the WinPE operating system inside the USB drive and eventually open up the PCUnlocker program. PCUnlocker automatically searches your Windows 8 installation and displays a list of Windows 8 user accounts on your ThinkPad tablet.
  6. Choose a user account and click on Reset Password button. The program will reset your forgotten Windows 8 password immediately. Restart the tablet and remove the USB drive. You can then log into your ThinkPad Windows 8 tablet without a password!

Forgot your ThinkPad Windows 8 tablet password? It’s so easy to reset it using PCUnlocker boot USB drive. No need to restore your ThinkPad tablet to factory settings.

How to Reset Windows 8 Password on HP ElitePad Tablet

$
0
0

Forgot Windows 8 password on your HP ElitePad tablet? Are you stuck at the login screen and can’t do anything to get into desktop? What can you do in such a situation? The easiest way is to restore your tablet to factory settings. But what if you have some very important files on the tablet? In this tutorial we’ll show you how to reset lost Windows 8 password on HP ElitePad tablet.

How to Reset Windows 8 Password on HP ElitePad Tablet?

Before we begin, take note you need to have a 512 MB or larger USB drive (also known as USB flash/thumb drive). Once you have one, do the following:

  1. Download the zipped ISO image of PCUnlocker and save it on an alternate PC. After the download is complete, unzip the download file which contains a bootable ISO image file: pcunlocker.iso.
  2. Insert a USB drive to the computer. Burn the ISO image file to your USB drive using ISO2Disc program.
  3. After your USB driver is burned successfully, plug it into your HP ElitePad tablet. Press and hold the volume down button and the power button simultaneously to turn on the tablet and display the Startup menu.
  4. Choose F9 Boot options and select the external USB flash drive as the boot device. Your Elitepad will start the WinPE operating system. After a while you’ll see the PCUnlocker program, which locates all your Windows 8 user accounts.
  5. Choose a user account and click on Reset Password button. The program will reset your forgotten Windows 8 password in no time. Restart the machine and remove the USB drive. You can then log into your Windows 8 ElitePad tablet without a password!

How to Restore Your Windows 8 Computer to Factory Settings without Logging in

$
0
0

There are many situations that we need to restore Windows 8 computer to factory settings. For example, the computer starts becoming laggy, the system doesn’t respond properly and experiences unexpected system crashes, or you need to remove your personal information in Windows 8 before selling or donating your PC.

In this tutorial we’ll show you how to restore your Windows 8 computer to factory settings without logging in. This is also useful in case you are unable to log on your computer for performing system restore, such as forgot Windows 8 password.

How to Restore Your Windows 8 Computer to Factory Settings without Logging in?

Before getting started, please make a backup of all important files on your computer. It’s also recommended to use Password Recovery Bundle to retrieve software license keys, recover passwords stored in your web browser or email client, and then backup them in a safe place. Now let’s walk you through the steps of restoring your Windows 8 computer to factory settings:

Turn on your computer and wait until it boots into the Windows 8 login screen. If the computer logs on to your user account automatically, you need to manually log off in order to bring up the login screen.

windows-8-login-screen

Hold down the SHIFT key and click on the Power icon visible on the bottom right of Windows 8 login screen, then click Restart option. In a moment you’ll see the recovery screen. click on the Troubleshoot option.

recovery-mode

Now click on the Reset your PC option.

troubleshoot

Click Next. The system will reboot and begin preparing to reset your PC.  This will remove everything that you might have had – apps, personalization, files and all – and bringing your machine to a completely original factory state. This is more usable in scenarios where you either want to start a new re-installation, or when you’re selling your PC or laptop, for instance.

How to Reset Windows 8 Login Password without Using Third-Party Boot CD

$
0
0

I’m locked out of my computer because I forgot my Windows 8 password. What can I do? To help you out if (when) you forget your Windows 8 password, here we’ll show you a simple trick which allows you to reset forgotten Windows 8 login password without using third-party boot CD. No need to download or install anything on your computer.

This trick requires you to replace the Ease of Access Center application (utilman.exe) with Command Prompt program. In the bottom-left corner of the Windows 8 logon screen sits the Ease of Access button. Click on it, you’ll find many Accessibility options such as the Magnifier, High Contrast Theme, Narrator and On Screen Keyboard. It’s a great feature for disabled people but it opens up a security hole that we can take advantage of to bypass Windows 8 password.

How to Reset Windows 8 Login Password without Using Third-Party Boot CD?

Before getting started, you need to create a Windows 8 Recovery Drive using another Windows 8 PC. If you don’t have another Windows 8 PC, you’ll have to bug one of your friends to use theirs.

Boot your locked Windows 8 PC from the Windows 8 Recovery Drive (you might have to adjust the BIOS to allow booting from the CD). You’ll see the recovery screen. click on the Troubleshoot option.

recovery-mode

Now select Advanced Options.

troubleshoot

In a moment you’ll see the Advanced options screen, as shown below. Click the Command Prompt option to open up a Command Prompt window.

advanced-options

Type diskpart command and press Enter. Next type list vol and press Enter, you’ll see a list of your disk partitions, from which you can easily find your Windows 8 installation partition. In our case D is the drive letter of my Windows 8 installation.

Diskpart

Type exit command to exit the DiskPart utility.

Next enter the following commands one by one. Make sure to replace D in the first command to the appropriate drive letter for your Windows 8 partition, if it’s different in your case.

D:
cd windows
cd system32
ren Utilman.exe Utilman.exe.bak
copy cmd.exe Utilman.exe

Replace the Utilman.exe

These commands will replace the Utilman.exe (Ease of Access) with the Command Prompt (cmd.exe). Now you can go ahead and reboot your machine.

Once booted to the login screen, click the Ease of Access button at the bottom left corner. It will open a Command Prompt window instead of the Ease of Access menu.

Login Screen

Type net user command and press Enter, it will list the exact names of all the user accounts available in your Windows 8 system.

Enter the command below to reset a lost or forgotten password. In this example, we will be changing top-password’s password to 123456.

net user top-password.com 123456

Replace top-password.com with the name of your user account.

Reset Forgotten Windows 8 Password

Type exit command and press Enter. You’ll return back to the login screen.

Now you should be able to log into your PC using the new password.

After getting into Windows 8, please remember to rename the Utilman.exe.bak back to Utilman.exe. That’s it – you have successfully reset your forgotten Windows 8 password without using third-party boot CD.

Conclusion

While this trick works, there are other ways to reset lost Windows 8 password that are far easier. PCUnlocker, for example, is a powerful, WinPE-based tool that can blank Windows 8/7/Vista/XP password in fewer steps and much less time! PCUnlocker also supports password resetting for Microsoft account in Windows 8.


How to Disable Ease of Access Button in Windows 8 Logon Screen

$
0
0

If you have been using Windows 8, you may have noticed the small Ease of Access button on the bottom left corner of Windows logon screen. This button allows you quickly access Ease of Access features such as narrator, magnifier, high contrast, on-screen keyboard right from the logon screen. In this tutorial we’ll show you how to disable the Ease of Access button in Windows 8 logon screen.

How to Disable Ease of Access Button in Windows 8 Logon Screen?

Press Windows + X key combination to bring up the Power User menu, and then click/tap on Command Prompt (Admin) option. It will open up the Command Prompt immediately.

Enter the following command and press Enter. This will modify the ACL on the utilman.exe file so everyone doesn’t have permission to execute this program.
cacls %windir%\system32\utilman.exe /C /D Everyone

utilman

You will be prompted with a Y/N just type Y and hit Enter and close the Command Prompt. If you receive the “Access Denied” error, you need to change the owner of Utilman.exe from Trustedinstaller to Administrators before running the command above.

change-file-owner

Tips: If you don’t know how to change the owner, please refer to this article: How to Take Ownership & Grant Full Control Permissions to Files & Folder in Windows 8/7/Vista.

After disabling the Ease of Access button, log off your user account. Now you’ll get nothing anytime you click on the Ease of Access button from Windows 8 logon screen.

How to Disable the Sticky Keys in Windows 8/7/Vista

$
0
0

If you’ve ever pressed the Shift key five times in quick succession, intentionally or accidentally, you’ve no doubt seen the Sticky Keys dialog box.

sticky-keys

Sticky Keys is designed for people who have difficulty holding down two or more keys simultaneously. Suppose you want to launch Windows Explorer via the keyboard shortcut. Normally that means holding down the Windows key and tapping E. After enabling Sticky Keys, you can open Windows Explorer by pressing Windows key, releasing it and then pressing E. You don’t have to press two keys simultaneously.

However, the Sticky Keys dialog box can be a minor annoyance to users who do not need them. It also opens up a security hole which lets unauthorized users to access your computer by resetting Windows 7 password using Sticky Keys trick. In this article we’ll show you how to disable the Sticky Keys features in Windows 8, 7 and Vista.

How to Disable the Sticky Keys in Windows 8/7/Vista?

Open the Control Panel. Under View by, choose the Small icons to view a list of all Control Panel items. Click the Ease of Access Center item and click the link Make the keyboard easier to use.

ease-of-access

Once you are there, uncheck the Turn on Sticky Keys option. But that does not prevent Windows from asking if you want to turn on the features if you happen to press the Shift key five times. To turn off the dialog box and thus relieve the annoyance, you will have to dig a bit deeper.

turn-off-sticky-keys

Click on the Set Up Sticky Keys link to reach the configuration screen. On this screen, you want to uncheck the Turn on Sticky Keys when SHIFT is pressed five times box. That will prevent Windows from asking if you want to turn the feature on.

set-up-sticky-keys

Click OK button to save your changes, and you should no longer see the Sticky Keys popup warning you that the feature has detected your key presses and decided to activate itself.

Account Lockout Policy Not Working for New Sign-in Options in Windows 8

$
0
0

One of the changes in Windows 8 that draws the most attention is the sign-in options. Windows 8 allows you to log on using Microsoft account, four-digit PIN and picture password, as alternate sign-in options for conventional text password. However, I discover that the Account Lockout policy is not working for the new sign-in options.

I set the number of logon attempts before locking the system, and specify the Account Lockout duration using the Local Security Policy Editor in Windows 8.

account-lockout

After enabling the account lockout policy, restart the system. When it boots to the Windows 8 logon screen, I try several wrong passwords with my Microsoft account intentionally, Windows keeps saying password is incorrect but never lock my Microsoft account, and I can then immediately log into the system using a correct password. The same thing happens with PIN code and picture password.

I think this is a great security hole or bug with Windows 8 operating system. Account Lockout policy is designed to disable a user account if an incorrect password is entered a specified number of times over a specified period. It help you to prevent attackers from guessing users’ passwords, and they decrease the likelihood of successful attacks on your network.

So I think it’s more secure to use a traditional text password than using the new sign-in options: Microsoft account, four-digit PIN and picture password.

The Secrets of Windows 8 Microsoft Account

$
0
0

How safe is Windows 8 Microsoft account? Should I use a Microsoft account or local account? Can I log in to Windows 8 Microsoft account without Internet connection? How to unlock my computer if I forgot Microsoft account password? In this article we’re going to explore all the secrets of Windows 8 Microsoft account.

Is Microsoft Account Password Locally Cached in Windows 8?

When you successfully log in to Windows 8 with a Microsoft account, the logon credentials of your Microsoft account are cached locally on your computer. If you then disconnect that computer from the network and try to log on, Windows will authenticate your password locally using the cached credentials. The main advantage of a cached logon credentials is that users can also log on to their computer without Internet connection.

The cached logon credentials of Microsoft account are stored in your Windows SAM registry hive (c:\windows\system32\config\sam). To view the credentials, follow these steps:

  1. Press Windows + R key combination to bring up the Run box. Type regedit and press Enter.
  2. When the Registry Editor opens, navigate to HKEY_LOCAL_MACHINE\SAM. By default, this subkey appears as empty. To expand this subkey, right-click on the SAM key and select Permissions, this will open the Permissions dialog for that subkey. Click the Administrators group and grant Full Control privileges.
  3. Expand the SAM subkey and navigate to the subkey: HKEY_LOCAL_MACHINE\SAM\SAM\Domains\Account\Users\000003E9. Here 000003E9 is the RID of my Microsoft account and it may be different in your side.

    microsoft-account-password

  4. On the right panel, you can find the CachedLogonInfo value, which stores the login credentials of your Microsoft account. But you can’t see the clear-text password because it is encrypted.

How Long Does Windows Cache Microsoft Account Password?

The cached logon credentials will never expire itself. If you change your Microsoft account password online via https://login.live.com, the cached logon credentials won’t update until you successfully log in to Windows 8 with the new password. After you have successfully logged in to Windows 8 with the new password, you cached logon credentials are updated.

However, after changing your Microsoft account password online, if you never use the new password to log in to Windows 8, the cached logon credentials are not updated, even if your computer has Internet connection. In such situation, you can still log in to Windows 8 using your old password. The system will always check your password against the cached logon credentials firstly. If it doesn’t match, it then checks your password online when your computer has Internet connection.

Is It Secure to Use Microsoft Account to Log in to Windows 8?

The cached logon credentials is the last logged-on password used for your Microsoft account. It is a significant security risk. If your computer ends up in the wrong hands, an attacker can run a brute force attack to find out the local cached Microsoft account password.

However, there is not any password cracking software out there which can support this type of account, that is because Microsoft account is a completely new thing to users, and Microsoft account password is encrypted using much stronger encryption algorithms than local user account password.

To reduce the security risk, it’s better to use a strong Microsoft account password. It’s also recommended to log in to your Microsoft account online and set up the security information, including alternate email addresses, your phone numbers, security questions and trusted PCs. This can help you reclaim your account when your Microsoft account is hacked.

How to Log in to Windows 8 After Forgetting Microsoft Account Password?

What to do if you forgot your Microsoft account password? The easiest way is to reset your password online via Microsoft’s website, but it requires you to provide the security information that is associated with your Microsoft account. If you’re unable to verify the security information, you can also access your computer by replacing the cached logon credentials of your Microsoft account.

PCUnlocker is a powerful Windows password reset utility which can run from a bootable CD or USB drive. After booting from PCUnlocker Live CD/USB drive, simply choose the local user account which is linked to your Microsoft account, and then click on “Reset Password”. The program will replace the cached logon credentials on your local computer, so you can then log back into Windows 8 with a new password.

How to Enable or Activate Windows Administrator Account without Logging In

$
0
0

I have Windows XP Media Center. Unfortunately I disabled the user account (which I think might have been the admin account) for the log on to Windows and can no longer get past the log on screen. Is there anyway to re-enable that account so I can access my computer again?

Have you disabled the Windows administrator account and can’t log on to your computer? Need to enable the the built-in administrator account for troubleshooting purposes? There are many situations that we need to enable or activate Windows administrator account without logging in. Here is an easy fix.

How to Enable or Activate Windows Administrator Account without Logging In?

  1. First of all, you need to create a PCUnlocker Boot CD using another computer. Download and install Password Recovery Bundle on the computer. Launch the program and click on “Windows Password” button, it will display a new window which enables you to create a PCUnlocker Boot CD easily.
  2. Put the PCUnlocker Boot CD in the optical drive of the locked computer that you’re trying to gain access to. Set your optical drive as the first boot device in BIOS. Start the computer and it will boot from PCUnlocker Boot CD then.
  3. After a while, the program inside the Boot CD will launch. It automatically finds all Windows user accounts on your system, and display user account properties for each user: Locked Out, Disabled and Never Expire.
  4. Choose your administrator account that is disabled, and then click on “Reset Password” button. The program will enable the administrator account and also remove the password.
  5. Restart the computer and remove the PCUnlocker Boot CD. You can then start your computer and log back in to your administrator account with a blank password.

Conclusion

So that is how can you enable / activate Windows administrator account without logging in. It’s very useful when you’re unable to log on your computer, or you can only log in with Guest account but don’t have administrator privileges. If you can log in to Windows with administrator privileges, then you can enable / disable Windows administrator account easily from Command Prompt.

How to Fix Windows Login Screen Showing Only Last Logged-on User

$
0
0

I am running Windows 7 64-bit Professional, and have two user accounts on my computer. Problem is that the login screen only shows the last logged in user and an “Other User” icon which allows you to input username manually. Is there any way of reverting to showing a list of all the users instead?

If you have multiple user accounts in Windows 8, 7 or Vista, you may notice a new annoyance – The login screen only displays the last logged-on user and a blank image with the label “Other User”. When the latter is clicked, two text fields will appear prompting for username and password.

last-logged-on-user

Here we’ll show you how to fix this problem so you can see a list of users at the login screen. This method will also prevent Windows from automatically logging in to the last user account.

How to Fix Windows Login Screen Showing Only Last Logged-on User?

Press Windows + R key combination to bring up the Run box. type netplwiz and press Enter. If this isn’t functioning, type control userpasswords2. This will take you to the same place.

run-box

Once in the user accounts window, check the box labeled “Users must enter a user name and password to use this computer”.

useraccounts

Click OK. Restart your computer and see if the login screen is now back to normal again with all user icons displayed.

Note: You must be logged in as an administrator to be able to do the steps in this tutorial. If you can’t remember the administrator password, you can reset it using PCUnlocker Live CD or USB drive.

How to Unlock Password Protected Laptop

$
0
0

Forgetting or losing administrator password will prevent use of your password protected laptop. This problem can be resolved by using a bootable PCUnlocker CD that will help you unlock password protected laptop by resetting the admin password. Save yourself the headache of fighting to get back into your computer!

This method is fast and easy! Just download the PCUnlocker software, burn it to a CD, insert the CD into the password protected laptop and all the current passwords will be removed so you can get back into Windows and get to work.

How to Unlock Password Protected Laptop?

  1. First you need to make a PCUnlocker CD using another computer. Once you’ve downloaded the zipped ISO image of PCUnlocker, unzip the download file and you’ll get the pcunlocker.iso file. Burn the ISO image to CD using ISO2Disc program.
  2. Place your PCUnlocker CD in the CD-ROM of your password protected laptop. Power on the machine and set CD/DVD-ROM as the first boot device in BIOS, so your laptop should boot into the CD drive instead of your normal operating system.
  3. Once booting from the PCUnlocker CD, it will load the WinPE operating system and finally start the PCUnlocker program itself. The program detects your Windows installations and displays a list of Windows user accounts.
  4. Choose a user account and click on “Reset Password” button. It will unlock your user account and remove the forgotten password immediately.
  5. Reboot the machine and remove the PCUnlocker CD. You can then get into Windows without a password! You’ve successfully unlocked a password protected laptop.

How to Fix “Cannot Log on to Windows After Removing from Domain”

$
0
0

Problem:

After you change a computer’s membership from a domain to a workgroup and restart the computer, you cannot log on with your previous user name and password. You may also receive the following error message:

The system could not log you on. Make sure your user name and domain are correct, then type your password again. Letters in passwords must be typed using the correct case. Make sure that Caps Lock is not accidentally on.

Solution:

This problem occurs because the user name and password that you previously used are available for logon only to a domain. Your computer is no longer a member of a domain. Therefore, your logon attempt must be validated on the local computer by using the local security database. To log on to your computer, you must use the local user account existing in the Security Accounts Manager (SAM), not the domain user account.

If you do not know the local user account and password, you cannot log on to the computer. To resolve this issue, the easiest way is to use PCUnlocker Live CD to blank your local admin/user password. Here are the step-by-step instructions:

1. Download the zipped ISO image of PCUnlocker using another computer you have access to. Unzip the download file and burn the pcunlocker.iso file to a blank CD using ISO2Disc program.

2. Put the PCUnlocker Live CD into the CD drive of the locked computer that you’re trying to gain access to. Have the computer to boot from PCUnlocker Live CD.

3. After booting from the Live CD, it will start the PCUnlocker program after a while. Choose the local administrator account and then click on “Reset Password”. The program will blank the local administrator password instantly.

4. Restart the machine and remove the PCUnlocker Live CD, you can then log on to Windows with the local administrator account, without being prompted to enter a password!

How to Fix Error 0x0000005D When Booting from Windows 8 Installation Disc

$
0
0

When installing Windows 8 on a new PC or in Oracle VM Virtual Box or VMware, many users are getting the error that says “Your PC needs to restart. Please hold down the power button. Error Code: 0x0000005D.” during the booting process.

Unlike Windows Vista and 7, Windows 8 is not compatible with all models of AMD/Intel processor. To fix the 0x0000005D error, you must have processor that supports Data Execution Prevention features. It has two different names. For, Intel processor its called “Execute Disable (XD)” and for AMD processor “No Execute (NX)”. Most CPUs have support for these features, so if you receive this error, it is likely because the XD or NX feature is not enabled on your system.

How to Enable Data Execution Prevention feature?

Once you enter in BIOS, go to Advanced Options and select Processor then No Execute Memory Protection, if not, then Security > Options and Select Execute Disable. Change this to ‘Enable’ or ‘On’.

If the BIOS setting for the XD/NX support option is not available on your system, you may need to contact the manufacturer for updating the BIOS. Note that some older processors may not contain these features and will be incompatible with Windows 8. If you want to check if XD/NX is available or enabled in your system, you can download Securable which will tell you.

If your processor supports Virtualization Technology (VT) & Data Execution Prevention features, then you should see the following result in your screen:

securAble

Getting Error Code 0x0000005D during Booting Virtual Machine from Windows 8 Installation Disc?

When trying to boot a virtual machine from Windows 8 installation disc, you may also get the 0x0000005D error.

windows-8-boot-error

To fix this problem, you also need to follow the instructions above to enable Data Execution Prevention feature in the BIOS of your physical machine. Moreover, enable the “Virtualization Technology (VT)” feature in BIOS.

Here is how to enable VT option in DELL poweredge server:

Reboot your DELL poweredge server, press F12 to go to the BIOS, select “Processor Settings”, and set “Virtualization Technology” to “Enabled”.

However, from my experience, even if I have enabled both the “Data Execution Prevention” and “Virtualization Technology (VT)” features in the BIOS of host OS, I still get the 0x0000005D error while booting a VMware virtual machine from Windows 8 ISO image. Eventually I fix the error by changing the operating system version under Virtual Machine Settings of VMware Workstation.

vmware-settings

As long as you change the version to any x64 edition, the 0x0000005D error will disappear immediately.

Differences Between User Account Expiration and Password Expiration

$
0
0

In this article we’ll explore the differences between user account expiration and password expiration, and show you how to turn off them in Windows.

Password Expiration

Windows may notify you at log-on that your password is expired and ask whether you want to change it now. The default interval that users were notified of password expiration was 14 days before expiration. In Windows 7 and Windows Server 2008 R2, the default password expiry notice occurs 5 days before the password expiration date.

user-password-expired

Password expiration interval specifies the number of days allowed before a password must be changed. Its purpose is to help enforce password policies in a business environment.

User Account Expiration

User account expiration is another similar built-in feature in Windows. It allows you to create a temporary user account that will expire automatically on the specified dates.

user-account-expired

Upon reaching the expiration date, the user account is expired and you are unable to log on Windows any more. This feature is very useful when you need to create a Windows user account on a temporary basis.

Difference Between User Account Expiration and Password Expiration

If your Windows password has expired, you are required to change the password at the logon screen. After changing it, you can then log back into Windows with your new password. But if your user account is expired, Windows doesn’t provide you any option for you to log in to that user account.

1. How to Turn Off Password Expiration?

The simple solution to turn off password expiration is open a elevated command prompt and execute the following command:

net accounts /maxpwage:unlimited

However, that will set the maximum password age for all accounts on the local machine to unlimited, not just the new accounts that you have created.

If you need to turn off password expiration for an individual user account, then run this command on the Command Prompt:

WMIC USERACCOUNT WHERE Name=’Tom’ SET PasswordExpires=FALSE

Remember to replace Tom with the existing user account on your local computer.

2. How to Turn Off User Account Expiration?

Using the net user command you can turn off user account expiration easily. Just enter the following command, replacing Tom with your actual account name:

net user Tom /expires:never

net-user

Most computer users might have misunderstood about the net user command above, thinking it would turn off password expiration. Actually, it is designed to set a expiration date for a user account or turn off user account expiration.

3. How to Turn Off both User Account Expiration and Password Expiration in Active Directory?

  1. Click Start, highlight “Administrative Tools” and select “Active Directory Users and Computers”.
  2. Now, expand your domain name on the left side, and go to the node where it says “Users”.
  3. Right-click the domain user account from the right panel, and then click Properties.
  4. On the Account tab, you can tick the “Password never expires” checkbox, and set “Account Expires” to “Never”.

    ad-account-expires

Tips: If you are unable to log on Windows because your Windows password is expired or user account is expired, you can unlock your user account and password easily with PCUnlocker program.

How to Log on If Windows Local Account or Active Directory Account Has Expired

$
0
0

I have a Windows 2003 computer that is not part of a domain. It is a member of a workgroup. When I try to login, I get the error message: “Your account has expired. Please contact your system administrator”. Is there any way to unlock the expired Windows user account?

Using the net user {username} /expires:{date | never} command, you can easily set an expiration date for Windows user account. When the expiration date is bypassed, the system doesn’t allow you to log in to that user account and it will give you the logon failure message shown as below.

windows-account-expired

So what to do if your local account or Active Directory account has expired? If you don’t have an alternate administrator account, you’ll be completely locked out of your computer and can’t log on at all. Luckily there is bootable password recovery utility – PCUnlocker, which can help you unlock any expired local account and Active Directory account easily.

PCUnlocker is mainly used to reset forgotten Windows user password, but it can also be used to unlock Windows user account that is expired, locked out or disabled. It supports all versions of Windows, as well as Active Directory servers.

How to Log on If Windows Local Account or Active Directory Account Has Expired?

  1. Download the zipped ISO image of PCUnlocker using an alternate computer. Extract the pcunlocker.iso from the download file, and then burn it to a CD or USB flash drive using ISO2Disc program.
  2. Now connect the CD or USB flash drive to your computer that you’re trying gain access to. Change the boot order in BIOS and get the computer to boot from the CD or USB flash drive.
  3. Once booting from the CD or USB flash drive, it will start the PCUnlocker program itself in less than one minute. The program automatically locates your Windows user account and displays the account properties. You can see the password expiration option, but the account expiration option is not shown on screen.

  4. Choose a user account and then click on “Reset Password” button. The program will then reset the password, unlock/enable a locked-out or disabled account, and turn off the account expiration.
  5. Restart your computer and remove the CD or USB flash drive. You can then successfully log back in to your Windows account without any problem. It’s that simple!

How to Change Forgotten Windows 8 Password with Installation Disc

$
0
0

Forgot your Windows 8 administrator password? How to change or reset the password without any third-party software? We have previously talked about how to reset Windows 7 password with Windows installation CD. That trick also works with Windows 8. Here we’re going to walk you through the procedure to change forgotten Windows 8 password with Windows 8 installation disc.

Note: This trick is only intended for experienced users who forgot Windows 8 password. For average computer users, please use the easy-to-use software PCUnlocker to reset lost or forgotten Windows 8 password.

How to Change Forgotten Windows 8 Password with Installation Disc?

  1. Boot your Windows 8 computer from Windows 8 installation disc. Once the message “Press any key to boot from CD…..” appears, press the Enter key to continue.
  2. As soon as you get to the Windows Setup screen, press the SHIFT + F10 key combination to bring up the Command Prompt.

    windows-8-setup

  3. Type the following command (replace “d:” with the correct drive letter if Windows is not located on D:):
    copy d:\windows\system32\sethc.exe d:\
    This creates a copy of sethc.exe to restore later.
  4. Type this command to replace sethc.exe with cmd.exe:
    copy /y c:\windows\system32\cmd.exe c:\windows\system32\sethc.exe

    replace-sethc

  5. Now close the Command Prompt, and cancel the Windows Setup application. Eject Windows 8 installation disc and reboot your computer.

    cancel-windows-setup

  6. When you reach to the Windows 8 login screen. Press the SHIFT key 5 times in a row, the Command Prompt will then open.
  7. Enter the following command to change your forgotten Windows 8 password:
    net user top-password.com 123456

    reset-windows-8-password

    Replace top-password.com with your account’s name, and change the password 123456 with whatever you want.

  8. Congratulation! Now exit the Command Prompt and you can then log on your Windows 8 system with your new password.

    login-windows-8

Remember to copy the c:\sethc.exe file back to c:\windows\system32\sethc.exe to restore the original sethc.exe file. This trick works with Windows 8, Windows 8 Professional, Windows 8 Enterprise and Windows 8.1.

Viewing all 396 articles
Browse latest View live